How to Change Video Size in Premiere Pro
Right-click the still image in the Project panel.
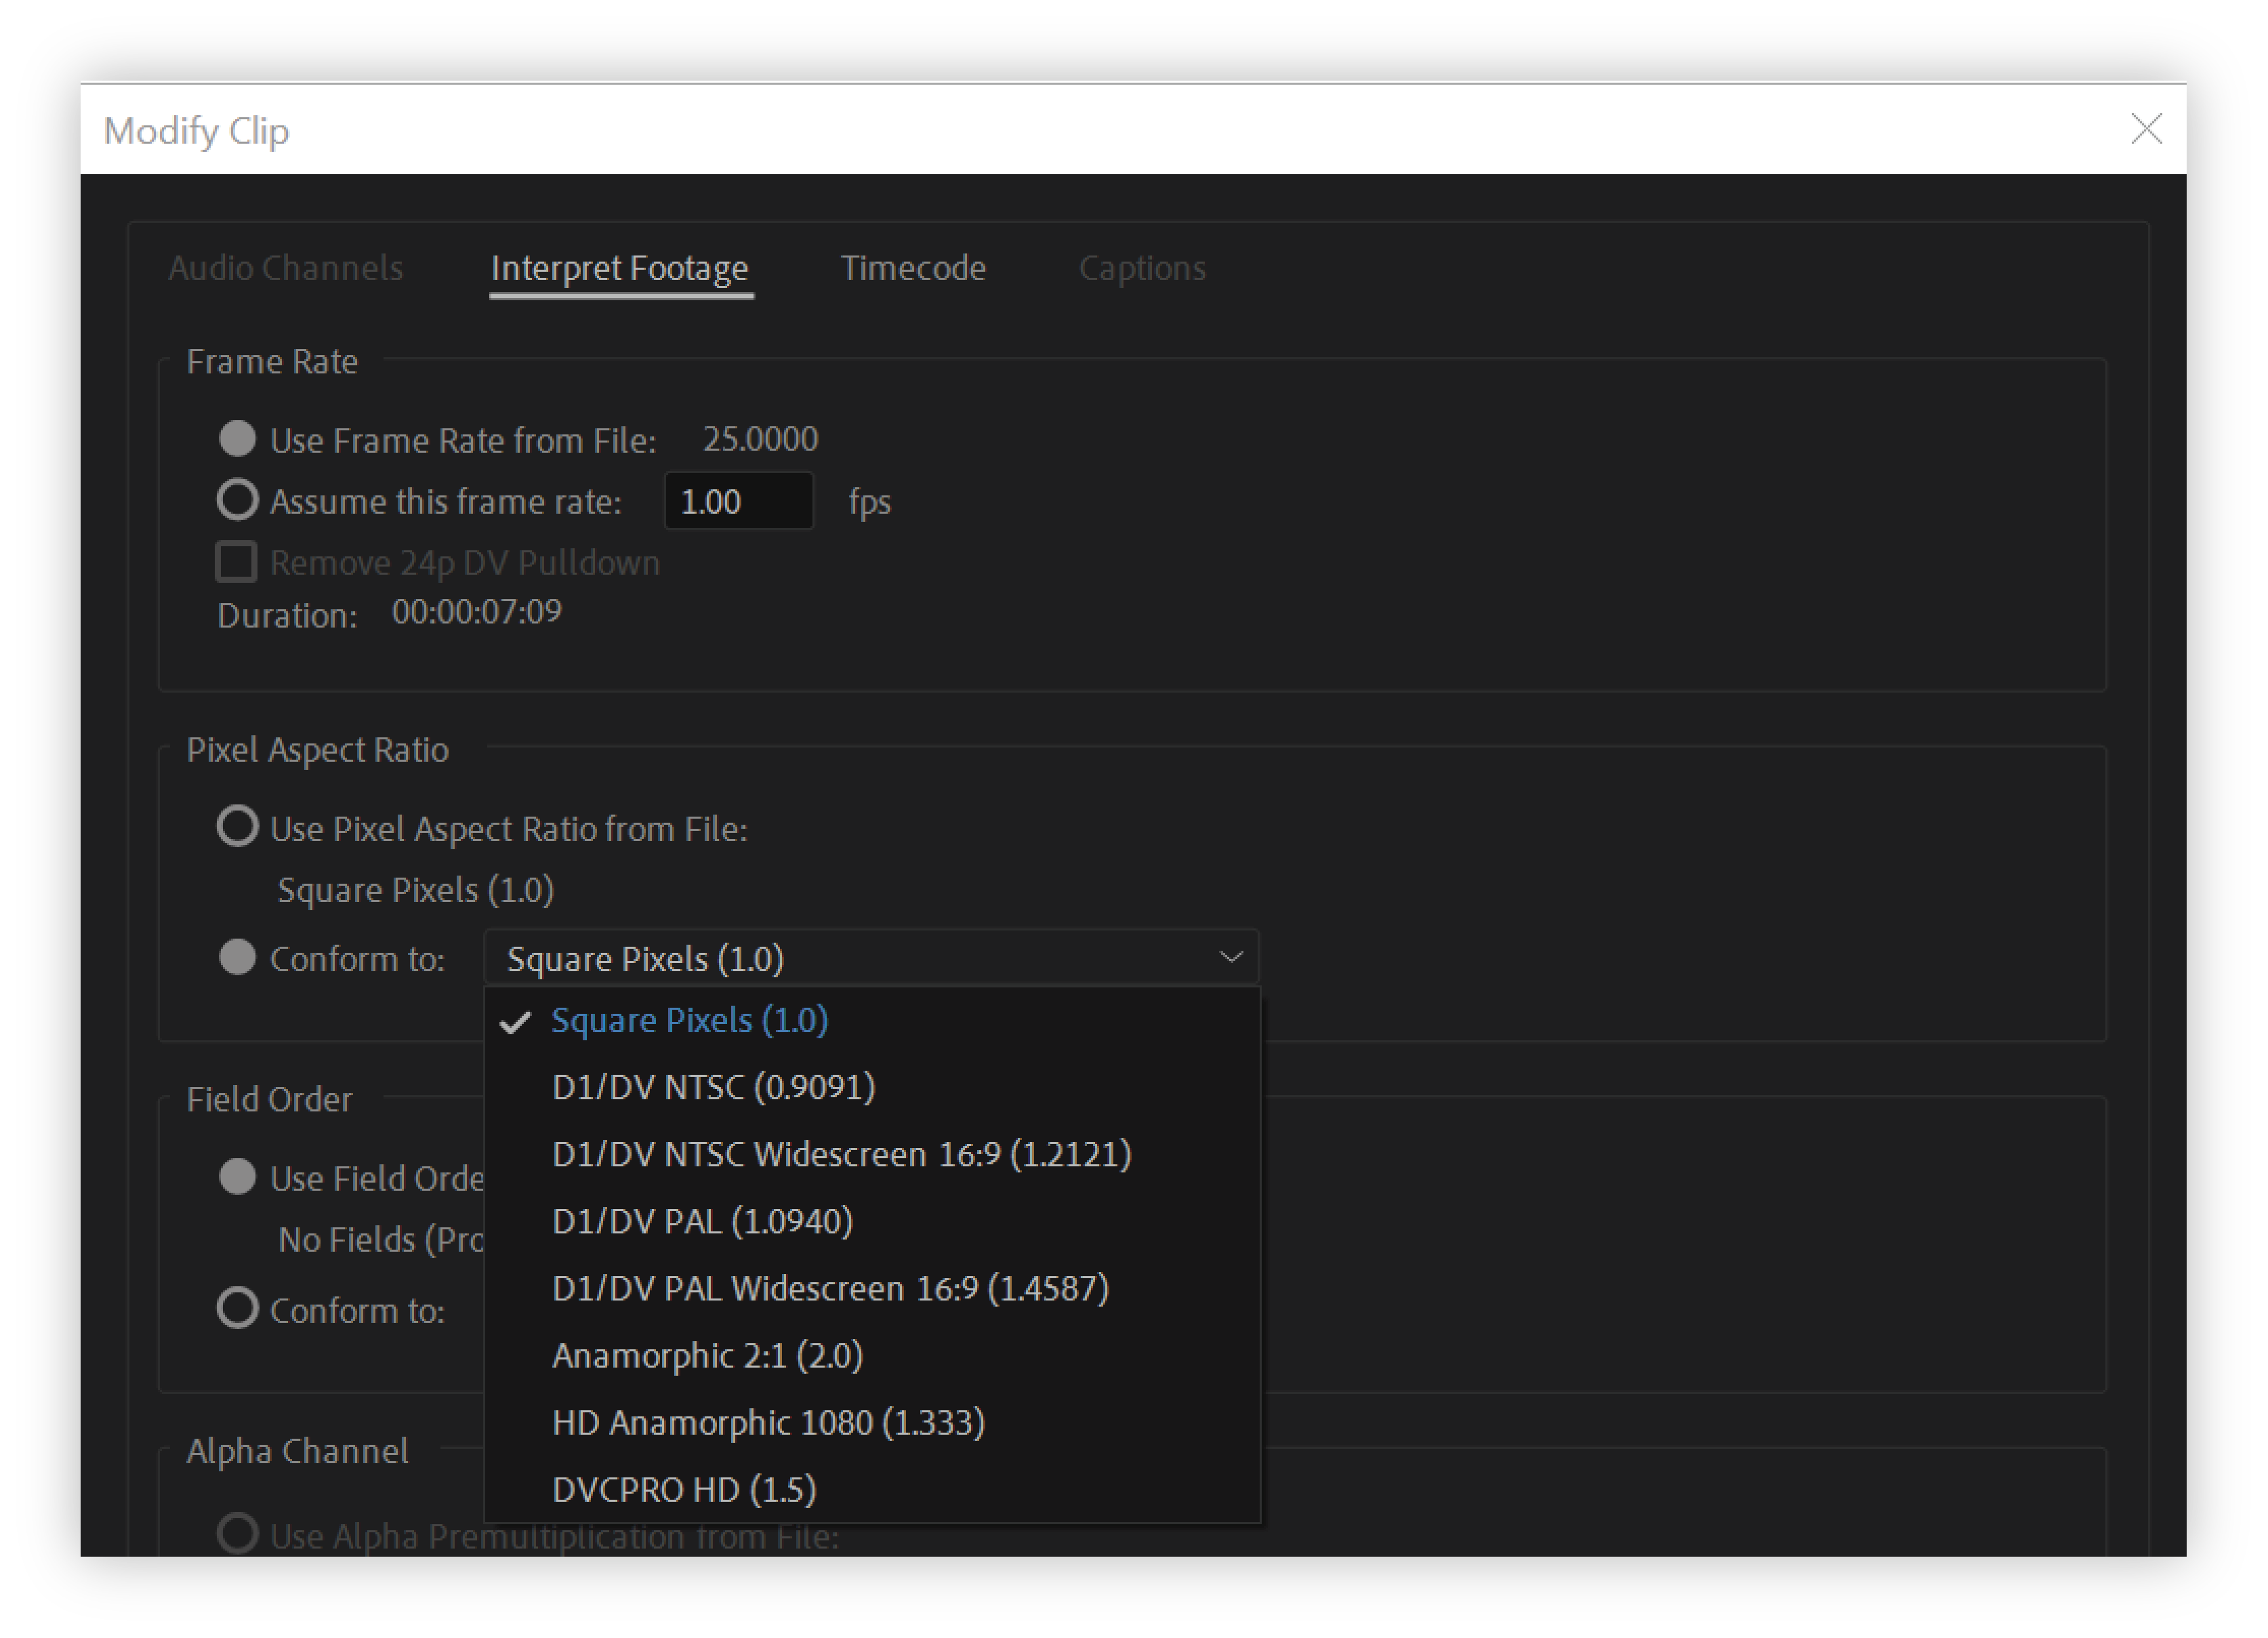
Select Clip > Modify > Interpret Footage.
Note:If you select a clip on the Timeline panel or Program monitor, the option is unavailable.
Select one of the following in the Pixel Aspect Ratio section:
Use Pixel Aspect Ratio From File
Uses the original aspect ratio saved with the still image.
Conform To
Lets you choose from a list of standard aspect ratios.

Modify clip Note:When using Photoshop to generate images for use in video projects, it’s best to use the Photoshop preset named for the video format you’ll use. Using the preset ensures that your images are generated with the correct aspect ratio.
Click OK.
For more detailed guide, refer to: https://www.winxdvd.com/resize-video/change-video-size-in-adobe-premiere-pro.htm
Use assets with various aspect ratios
When an asset is imported, Premiere Pro attempts to preserve the frame aspect ratio, pixel aspect ratio, and frame dimensions so the asset does not appear cropped or distorted.
For assets that contain metadata, these calculations are automatic and precise. For example:
- When you capture or import NTSC footage with the ATSC frame size of 704x480, the D1 frame size of 720x486, or the DV frame size of 720x480, the pixel aspect ratio is set to D1/DV NTSC (0.91).
- When you capture or import footage with the HD frame size of 1440x1080, the pixel aspect ratio is set to HD 1080 Anamorphic (1.33).
- When you capture or import PAL footage with the D1 or DV resolution of 720x576, the pixel aspect ratio is set to D1/DV PAL (1.094).
For other frame sizes, Premiere Pro assumes that the asset was designed with square pixels and changes the pixel aspect ratio and frame dimensions to preserve the image aspect ratio. If the imported asset is distorted, you can change the pixel aspect ratio manually.
Assets in a sequence
When you drag an asset into a sequence, the asset is placed at the center of the program frame by default. Depending on its frame size, the resulting image could be too small or over cropped for the needs of the project. Premiere Pro can change its scale automatically when you drag an asset into a sequence, or you can change it manually.
It is always important to interpreted files correctly. You can read asset frame dimensions and pixel aspect ratio near the preview thumbnail and in the Video Info column of the Project panel. You can also find this data in the asset Properties dialog box, the Interpret Footage dialog box, and the Info panel.
Aspect ratio distortion in sequences
The sequence settings preset you choose when you create a sequence sets the frame and pixel aspect ratios for the sequence. You can’t change aspect ratios after you create the sequence, but you can change the pixel aspect ratio that Premiere Pro assumes for individual assets.
For example, if a square-pixel asset generated by a graphic looks distorted in Premiere Pro, you can correct its pixel aspect ratio to make it look right. By ensuring that all files are interpreted correctly, you can combine footage with different ratios in the same project. Then you can generate output that doesn’t distort the resulting images.

Comments
Post a Comment